
MTU Series 4000 Heat Exchanger Plates: Cooling Performance, Fouling, Leaks & Replacement Guide
The heat exchanger plates on an MTU Series 4000 marine engine installation have one basic purpose:
transfer heat efficiently while keeping the cooling fluids separated.
They may look like relatively simple metal plates, but their condition can have a major influence on cooling performance.
A plate heat exchanger can continue working even when it is no longer working efficiently.
That is where problems become interesting.
The engine may still operate normally at idle.
At moderate load, everything may look fine.
But at higher power, the coolant temperature starts creeping upward.
Perhaps one engine on a twin-engine yacht consistently runs several degrees hotter than the other.
Or the heat exchanger has been opened and the plates are covered with deposits.
These are situations where the condition of the heat exchanger plates, plate gaskets, cooling-water flow and overall exchanger cleanliness should be considered together.
1. MTU Series 4000 Marine Engine Types
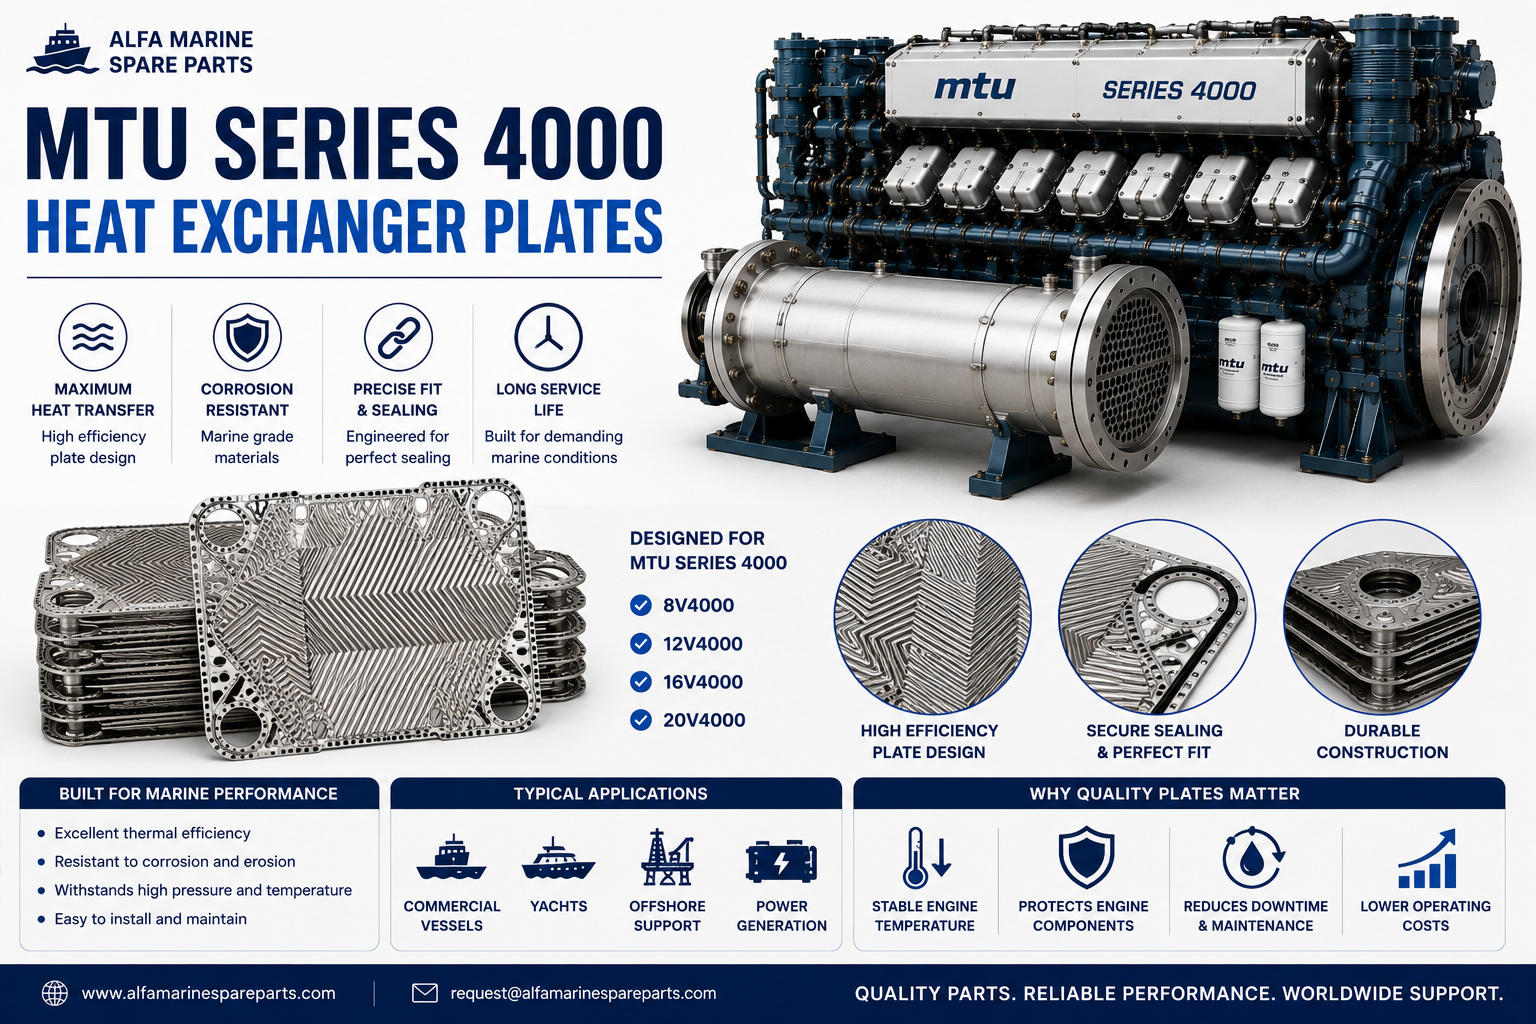
The MTU Series 4000 family includes several V8, V12, V16 and V20 marine engine configurations.
Common types include:
MTU 8V 4000
- MTU 8V 4000 M53
- MTU 8V 4000 M53R
- MTU 8V 4000 M54
- MTU 8V 4000 M63
MTU 12V 4000
- MTU 12V 4000 M53
- MTU 12V 4000 M63
- MTU 12V 4000 M64
- MTU 12V 4000 M65
- MTU 12V 4000 M65L
- MTU 12V 4000 M73
- MTU 12V 4000 M73L
- MTU 12V 4000 M93
- MTU 12V 4000 M93L
MTU 16V 4000
- MTU 16V 4000 M53
- MTU 16V 4000 M63
- MTU 16V 4000 M63L
- MTU 16V 4000 M64
- MTU 16V 4000 M65
- MTU 16V 4000 M65L
- MTU 16V 4000 M73
- MTU 16V 4000 M73L
- MTU 16V 4000 M93
- MTU 16V 4000 M93L
MTU 20V 4000
- MTU 20V 4000 M65L
- MTU 20V 4000 M73
- MTU 20V 4000 M73L
- MTU 20V 4000 M93
- MTU 20V 4000 M93L
The exact heat exchanger arrangement can vary according to the engine version and vessel installation.
For that reason, a request for:
“MTU 4000 heat exchanger plates”
should always be supported with the engine serial number and identification from the actual heat exchanger.
2. What Is a Plate Heat Exchanger?
A plate heat exchanger uses a series of thin metal plates to transfer heat between two separate fluids.
The plates are arranged so that the fluids flow through alternating passages.
In simplified form:
Hot coolant
↓
Plate
↓
Heat passes through the metal
↓
Cooling water removes the heat
The fluids remain separated.
The plate itself provides the heat-transfer surface.
This is why plate condition is so important.
3. Why Are the Plates So Thin?
A heat exchanger needs to transfer heat efficiently.
The thinner the heat-transfer barrier, within the limits of its design, the easier it is for heat to move between the two fluids.
The plates also commonly use formed or corrugated surfaces rather than being completely flat.
These patterns help:
- Increase effective surface area
- Control fluid movement
- Improve heat transfer
- Give the thin plate additional stiffness
The plate pattern is therefore functional, not decorative.
4. Why Heat Exchanger Plates Become Dirty
Marine cooling systems operate in difficult environments.
Depending on which fluid passes through the exchanger, deposits can develop from:
- Scale
- Salt
- Sediment
- Rust particles
- Marine growth
- Coolant contamination
- Oil contamination
- Corrosion products
These deposits form a layer between the fluid and metal surface.
That layer acts like insulation.
The exchanger can still transfer heat—but not as efficiently as before.
5. The Engine May Not Overheat Immediately
This is important.
A partially fouled heat exchanger can still provide enough cooling at low engine load.
Imagine an MTU 16V 4000 M73 idling in the marina.
Temperature is normal.
The yacht leaves port.
Engine load increases.
After twenty minutes, the temperature starts climbing.
The exchanger may still be working.
It simply may no longer have enough heat-transfer capacity for high-load operation.
That distinction matters.
6. Fouled Plates Can Reduce Cooling Performance
As deposits build on plate surfaces, heat has more difficulty moving through them.
Possible symptoms include:
- Higher coolant temperature
- Higher temperature under load
- Reduced cooling margin
- Different temperatures between twin engines
The change can happen gradually.
That is why recording normal operating temperatures is useful.
If the same engine begins running progressively hotter under similar conditions, something has changed.
7. Flow Restriction Can Develop Too
Fouling does more than reduce heat transfer.
Deposits can also reduce the available flow area between plates.
That can create:
- Higher pressure drop
- Reduced cooling-water flow
- Uneven distribution
- Poorer heat transfer
Now the exchanger has two problems:
less effective heat-transfer surface
and:
less effective fluid flow.
8. Situation: One MTU 4000 Runs Hotter Than the Other
Twin-engine installations give engineers an excellent diagnostic reference.
Suppose a vessel has twin MTU 16V 4000 M93 engines.
At similar RPM and load:
Port engine: normal temperature
Starboard engine: consistently hotter
Compare:
- Cooling-water flow
- Heat exchanger condition
- Plate cleanliness
- Seawater strainers
- Pumps
- Coolant level
- Charge-air temperatures
- Oil temperatures
If operating conditions are genuinely similar, the healthy engine helps establish a useful baseline.
9. Seawater Fouling
Where seawater passes through a plate exchanger, marine contamination can become an important issue.
Possible deposits include:
- Salt scale
- Sand
- Fine sediment
- Shell fragments
- Marine growth
Even relatively thin deposits can affect performance because the passages between plates are designed for controlled flow.
10. Oil on the Plates Is a Warning
If a cooling-side plate is unexpectedly covered with oil, do not simply clean it and close the exchanger.
Ask:
Where did the oil come from?
Possible causes elsewhere in the system should be investigated.
Cleaning removes the evidence.
It does not repair the source of contamination.
11. Rust and Corrosion Products
Rust particles can travel through a cooling system and accumulate inside the exchanger.
They may come from:
- Piping
- Tanks
- Other cooling-system components
- Corroding metal surfaces
If heavy rust contamination is found repeatedly, investigate upstream rather than treating exchanger cleaning as the complete repair.
12. Inspect the Plates When the Exchanger Is Open
Once the plate pack is accessible, inspect carefully.
Look for:
☐ Scale
☐ Corrosion
☐ Pitting
☐ Cracks
☐ Distortion
☐ Damaged sealing areas
☐ Blocked passages
☐ Oil contamination
☐ Uneven fouling
The pattern of contamination can sometimes reveal as much as the amount.
13. Pitting Deserves Attention
Pitting corrosion creates small cavities in the plate material.
At first they may appear cosmetic.
But remember:
heat exchanger plates are relatively thin.
Deep pitting can eventually penetrate the plate.
Once that happens, the two fluid circuits may no longer remain separated.
That is much more serious than ordinary external leakage.
14. What Happens if a Plate Develops a Hole?
A perforated plate can allow fluids from two separate circuits to communicate.
What happens next depends on:
- Which fluids are involved
- Relative pressures
- Operating conditions
Instead of seeing a leak outside the exchanger, contamination may occur internally.
That is why unexplained changes in fluid condition deserve investigation.
15. External Leak vs. Internal Plate Leak
These are very different problems.
External Leak
May come from:
- Plate gasket
- Connection
- End seal
- Flange
You may see fluid outside the exchanger.
Internal Leak
May come from:
- Cracked plate
- Perforated plate
- Severe corrosion damage
The fluid may cross into another circuit without producing an obvious external leak.
Internal leakage can therefore be harder to identify.
16. Pressure Testing Can Be Important
When plate damage or internal leakage is suspected, proper testing can help identify whether the exchanger remains internally sound.
This is particularly useful after finding:
- Heavy corrosion
- Suspicious pitting
- Fluid cross-contamination
- Repeated unexplained coolant loss
Do not automatically assume that new plate gaskets will solve an internal plate failure.
17. Heat Exchanger Plates and Gaskets Work Together
The plates provide the heat-transfer surfaces.
The gaskets help direct and contain the fluids.
Both have to be in good condition.
A perfect plate with a failed gasket can leak.
A perfect gasket cannot repair a perforated plate.
This is why heat exchanger service should evaluate the complete plate pack, not just one component.
18. Inspect Plate Gaskets During Cleaning
When a plate heat exchanger is dismantled, inspect gasket condition.
Look for:
- Hardening
- Cracking
- Flattening
- Swelling
- Cuts
- Poor adhesion where applicable
- Incorrect positioning
If the plates are cleaned but deteriorated sealing components are ignored, the exchanger may begin leaking after reassembly.
19. Plate Gasket Alignment Matters
A gasket does more than stop external leakage.
Depending on exchanger design, it can also help direct fluids through the correct passages.
A displaced or incorrectly installed gasket can interfere with:
- Sealing
- Flow distribution
- Circuit separation
This makes careful reassembly important.
20. Do Not Mix Up the Plate Sequence
A plate heat exchanger is not simply a pile of identical metal sheets that can be reassembled randomly.
Plate orientation and sequence matter.
Before dismantling, technicians should preserve or record the correct arrangement.
Incorrect reassembly can affect:
- Fluid routing
- Heat-transfer performance
- Sealing
This is one of the reasons exchanger work should be organized carefully.
21. Mark the Plate Pack Before Disassembly
A practical approach during servicing is to identify the existing arrangement before separating the plates.
This helps preserve:
- Sequence
- Orientation
- Original configuration
Photographs can also provide a useful record.
When dozens of similar-looking plates are on a workbench, remembering exactly how they were installed becomes much harder.
22. Do Not Damage Plates During Cleaning
Heat exchanger plates are designed to be thin.
Aggressive cleaning can damage them.
Potential problems include:
- Scratches
- Distortion
- Removal of protective surface material
- Damage around gasket grooves
Cleaning should remove contamination without creating a new failure point.
23. Be Careful With Mechanical Tools
A plate covered with hard deposits can encourage aggressive scraping.
But sharp tools can scratch the metal.
Those scratches can become:
- Corrosion starting points
- Leak paths
- Areas of reduced plate strength
The goal is a clean plate, not a polished but damaged plate.
24. Chemical Cleaning Must Match the Deposit
Different deposits respond differently to cleaning.
For example:
- Mineral scale
- Oil
- Biological fouling
- Rust contamination
may require different treatment.
An unsuitable cleaning chemical can attack the plate material or gaskets.
Cleaning should therefore be based on:
what the deposit actually is.
25. Plate Material Matters
Marine heat exchangers may use corrosion-resistant plate materials selected for the intended fluid and operating environment.
This is especially important where seawater is involved.
Do not assume that a plate made from a similar-looking metal is a suitable replacement.
Correct material affects:
- Corrosion resistance
- Heat transfer
- Mechanical strength
- Service life
26. Why Replacement Plates Need Correct Identification
A replacement plate needs more than approximately the same outside dimensions.
Important characteristics can include:
- Plate dimensions
- Thickness
- Material
- Corrugation pattern
- Port arrangement
- Gasket design
- Plate orientation
- Exchanger configuration
An incorrect plate can physically resemble the original while still being unsuitable.
27. Don't Order Plates From “MTU 4000” Alone
A request such as:
“Need heat exchanger plates for MTU 4000.”
does not provide enough information.
A better request would be:
Engine: MTU 16V 4000 M73
Engine Serial Number: __________
Heat Exchanger Manufacturer: __________
Heat Exchanger Model: __________
Heat Exchanger Part Number: __________
Plate Number: __________
Number of Plates Required: __________
Photographs: Attached
The exchanger identification can be just as important as the engine identification.
28. Vessel Installation Matters
The engine type alone may not determine every cooling component installed on the vessel.
Different vessel builders and installations can use different cooling arrangements.
That is why the actual heat exchanger should be identified.
Look for an identification plate containing information such as:
- Manufacturer
- Type
- Serial number
- Model
- Assembly number
Photograph it before requesting replacement plates.
29. MTU 8V 4000 Heat Exchanger Plates
For engines such as:
- MTU 8V 4000 M53
- MTU 8V 4000 M53R
- MTU 8V 4000 M63
plate requirements should be matched against the actual exchanger.
Do not assume plates from a larger Series 4000 installation are interchangeable simply because the engines belong to the same family.
30. MTU 12V 4000 Heat Exchanger Plates
Common engines include:
- MTU 12V 4000 M53
- MTU 12V 4000 M63
- MTU 12V 4000 M65
- MTU 12V 4000 M65L
- MTU 12V 4000 M73
- MTU 12V 4000 M73L
- MTU 12V 4000 M93
- MTU 12V 4000 M93L
During exchanger service, inspect both the plates and sealing components.
A clean plate pack with old, hardened gaskets can still become a leaking exchanger.
31. MTU 16V 4000 Heat Exchanger Plates
Examples include:
- MTU 16V 4000 M53
- MTU 16V 4000 M63
- MTU 16V 4000 M65
- MTU 16V 4000 M73
- MTU 16V 4000 M73L
- MTU 16V 4000 M93
- MTU 16V 4000 M93L
At high engine output, the cooling system must reject a considerable amount of heat.
Plate fouling that appears relatively minor visually can become much more important when the engine operates under sustained load.
32. MTU 20V 4000 Heat Exchanger Plates
Examples include:
- MTU 20V 4000 M65L
- MTU 20V 4000 M73
- MTU 20V 4000 M73L
- MTU 20V 4000 M93
- MTU 20V 4000 M93L
Large V20 installations place substantial demands on the cooling system.
Heat exchanger condition, pump performance, water flow and exchanger cleanliness all need to work together.
A partially restricted exchanger can reduce the cooling margin available during sustained high-power operation.
33. When Should Heat Exchanger Plates Be Cleaned?
There is no sensible universal answer based only on calendar time.
Cleaning requirements depend on:
- Operating hours
- Water quality
- Seawater conditions
- Vessel location
- Cooling-system condition
- Fouling rate
- Manufacturer maintenance requirements
A vessel operating in warm, biologically active seawater may experience different fouling conditions from a vessel operating in colder waters.
34. Temperature Trends Are Useful
Engine-room crews often know their machinery better than anyone.
If an engine historically operates at a stable temperature under a particular load, record it.
Then compare over time.
A gradual change from normal can provide early warning.
You do not need to wait for:
HIGH COOLANT TEMPERATURE ALARM
before investigating cooling performance.
35. Pressure Drop Can Tell You Something Too
When appropriate measurements are available, pressure difference across an exchanger can help indicate restriction.
As passages become fouled, resistance to flow can increase.
Temperature and pressure information together can provide a clearer picture than temperature alone.
36. More Plates Do Not Automatically Mean Better
Plate exchangers are engineered for specific:
- Flow rates
- Temperatures
- Pressure drops
- Heat loads
Changing the number of plates without engineering justification can alter exchanger performance.
Do not simply add plates because:
“more surface area must be better.”
The complete exchanger configuration matters.
37. Never Remove Plates Randomly Either
Similarly, removing damaged plates and simply compressing the remaining pack may alter:
- Heat-transfer capacity
- Flow characteristics
- Plate-pack dimensions
A damaged plate should be addressed according to the exchanger's correct configuration.
38. Plate-Pack Compression Matters
The assembled exchanger relies on the plate pack being compressed correctly.
Incorrect compression can contribute to:
- External leakage
- Gasket damage
- Plate distortion
- Poor sealing
Do not simply tighten the exchanger until the bolts “feel tight.”
The correct assembled dimension and procedure for the actual exchanger should be followed.
39. Inspect Tie Bolts and Frame Components
While servicing the exchanger, also inspect:
- Tie bolts
- Nuts
- Frame plates
- Guide bars
- Plate-support surfaces
Corrosion or damaged threads can make correct plate-pack compression difficult.
The exchanger is a complete assembly.
40. What If Only One Plate Is Damaged?
If one plate shows serious pitting or cracking while the others look good, investigate why.
Ask:
- Was flow uneven?
- Was contamination concentrated there?
- Was the plate damaged during earlier service?
- Is there galvanic or chemical attack?
- Is the material correct?
Simply replacing the damaged plate may restore the exchanger, but understanding the cause can prevent another failure.
41. Why Plates Sometimes Fail After Cleaning
A plate may appear to “fail because it was cleaned.”
In reality, cleaning may simply reveal damage hidden underneath heavy deposits.
Scale can cover:
- Deep pitting
- Pinholes
- Cracks
Once the deposits are removed, the true condition becomes visible.
This is why cleaned plates should be inspected before reassembly.
42. Pressure Test After Major Service
After plate cleaning, gasket replacement or exchanger overhaul, appropriate testing can help confirm that the exchanger is properly sealed before returning it to full service.
This is especially valuable when:
- Plates were heavily corroded
- Internal leakage was suspected
- Several plates were replaced
- The exchanger had previously mixed fluids
Finding a leak during testing is preferable to discovering it under full engine load.
43. First Startup After Heat Exchanger Service
After reassembly, inspect carefully during startup.
Watch for:
☐ External leaks
☐ Coolant level changes
☐ Seawater leakage
☐ Abnormal temperature
☐ Pressure changes
☐ Uneven heating
Do not assume the job is complete simply because the exchanger did not leak while cold.
44. Check Again After the Sea Trial
High-load operation is the real test.
After the sea trial:
- Inspect exchanger joints
- Check for fresh salt deposits
- Look for coolant traces
- Compare temperatures
- Compare twin engines where applicable
A plate exchanger may behave perfectly at idle but show problems once temperature, pressure and flow increase.
45. Heat Exchanger Plate Inspection Checklist
When the exchanger is opened:
☐ Record plate sequence
☐ Photograph orientation
☐ Inspect fouling
☐ Inspect scale
☐ Check corrosion
☐ Look for pitting
☐ Look for cracks
☐ Inspect plate ports
☐ Check gasket grooves
☐ Inspect gaskets
☐ Check plate distortion
☐ Confirm plate material
☐ Verify plate identification
☐ Test exchanger where required
This makes the overhaul more systematic.
46. Heat Exchanger Plates vs. Heat Exchanger Gaskets
These parts should not be confused.
Heat Exchanger Plate
The metal heat-transfer surface separating the fluid passages.
Plate Gasket
The sealing component positioned around applicable areas of the plate.
A customer asking for:
“MTU heat exchanger plate”
may actually need a:
- Plate
- Plate gasket
- Complete plate pack
- Gasket set
- Complete exchanger
Confirm exactly what is required.
47. Complete Plate Pack or Individual Plates?
Depending on exchanger condition, requirements can include:
Individual Replacement Plate
Useful when a limited number of plates are damaged and correct individual replacements are available.
Plate & Gasket Set
Useful during larger exchanger servicing.
Complete Plate Pack
May be considered when many plates are badly deteriorated.
Complete Heat Exchanger
May become necessary when the plate pack, frame or other major components are no longer economically serviceable.
The decision should be based on actual condition.
48. Don't Guess Heat Exchanger Plate Part Numbers
With Series 4000 installations, it is particularly important not to publish a random “MTU 4000 heat exchanger plate number” and imply that it fits every engine.
Heat exchanger configuration can differ considerably.
Correct identification should use:
engine serial number + heat exchanger identification + plate identification.
If a plate number is visible, record it.
If it is not, measure and photograph the plate and provide the exchanger identification.
49. What Information Should You Send When Ordering?
A useful inquiry looks like this:
Engine: MTU 16V 4000 M73
Engine Serial Number: __________
Heat Exchanger Manufacturer: __________
Heat Exchanger Model: __________
Heat Exchanger Serial Number: __________
Plate Part Number: __________
Plate Dimensions: __________
Number of Plates: __________
Quantity Required: __________
Gaskets Required: Yes / No
Photographs: Attached
That gives much more useful information than:
“Need MTU 4000 cooler plates.”
50. Frequently Asked Questions
What Do MTU 4000 Heat Exchanger Plates Do?
They provide the metal heat-transfer surfaces that allow heat to move between separate cooling fluids without those fluids normally mixing.
Can Dirty Heat Exchanger Plates Cause an MTU 4000 to Run Hot?
Yes. Fouling can reduce heat transfer and restrict flow, particularly becoming noticeable under high engine load.
Why Is My MTU 4000 Normal at Idle but Hot at Full Load?
Reduced heat exchanger performance is one possibility, but seawater flow, pumps, strainers, thermostatic control, engine load and other cooling components should also be investigated.
Can Heat Exchanger Plates Corrode?
Yes. Depending on the material, fluids and operating conditions, corrosion and pitting can develop.
Can a Damaged Plate Mix Seawater and Coolant?
A perforated or cracked plate can potentially allow communication between circuits that should remain separated.
Should Plate Gaskets Be Inspected During Cleaning?
Yes. Gaskets should be inspected whenever the exchanger is dismantled.
Can I Clean Heat Exchanger Plates With a Wire Brush?
Aggressive mechanical cleaning can scratch or damage thin plate material. Cleaning should remove contamination without damaging the plates.
Can I Remove a Damaged Plate and Continue Operating?
Do not alter the plate-pack configuration without confirming that the exchanger is designed to operate correctly in that arrangement.
Does Every MTU Series 4000 Use the Same Heat Exchanger Plates?
No. Plate requirements depend on the actual heat exchanger and vessel cooling installation.
What Information Is Best for Finding Replacement Plates?
The heat exchanger manufacturer, model, serial number and plate identification are extremely useful, together with the MTU engine model and serial number.
MTU Series 4000 Heat Exchanger & Cooling Parts
Common requirements can include:
- Heat exchanger plates
- Complete plate packs
- Plate gaskets
- Heat exchanger gasket sets
- O-rings
- Sealing rings
- Heat exchanger inserts
- Cooler cores
- Cooler housings
- End covers
- Seawater pumps
- Coolant pumps
- Oil cooler components
- Charge-air cooler components
- Thermostats
- Cooling pipes
- Cooling hoses
- Temperature sensors
Correct identification should be based on the exact engine and heat exchanger configuration.
Browse Our Complete Catalog
Marine engine brands:
https://alfamarinespareparts.com/our-brand
Marine spare parts:
https://alfamarinespareparts.com/spareparts
Contact Alfa Marine Spare Parts
For MTU Series 4000 heat exchanger plates, plate gaskets, plate packs and marine cooling-system components:
Email: request@alfamarinespareparts.com
For faster identification, provide:
MTU engine model + engine serial number + heat exchanger manufacturer/model + exchanger serial number + plate number + dimensions + quantity + photographs.
Final Word
The heat exchanger plates on an MTU Series 4000 marine installation should not be judged only by whether the engine is overheating.
A partially fouled exchanger may still work perfectly at idle.
It may even appear normal at moderate cruising speed.
The problem can become visible only when the engine is asked to produce serious power.
That is when cooling demand increases and the exchanger's remaining capacity becomes important.
If the plates are opened for inspection, look beyond dirt.
Ask:
Are the plates corroded?
Is there pitting?
Are the passages restricted?
Are the gaskets hardened?
Is one area much dirtier than another?
Is there evidence that the two circuits have been communicating?
And if a plate is damaged, do not simply replace it without considering why it failed.
The best heat exchanger service does more than make the plates look clean.
It restores:
correct flow + effective heat transfer + reliable sealing.
On high-output engines such as the MTU 12V 4000, 16V 4000 and 20V 4000, those three things can make a significant difference when the engine is operating continuously under load.